Saturday, January 21, 2012

Chocolate Salami (Salame de chocolate) - no baking required

Hi everyone.... I can't believe it has been since last year,  I posted last.  I have a lot of things going on now and most of my time I'm focusing on my stamps and crafting, which is fun also.  Anyways here is a yummy treat that I would like to share with you.  This is an old recipe which it has been in the family for many many years.  I hope you can try it yourself. 

Ingredientes for Chocolate salami

1 can condensed milk 
half package of Maria cookies (you can use any cookie you like) 
2 egg separated 
1 tbs of butter
2 tbs of milk chocolate
foil paper


1. In a small pan,  mix in the following ingredients condensed milk, yellow eggs, and chocolate mix. 


2.  Crush your cookies 


3.   Low flame mix in to the mix the 2tbs of butter for 25 to 30 minutes until it becomes a little thick 

4.   Mix the cookies into the mix


5.   Spread the mix in the foil paper and roll it tightly. 


6.  Store in the freezer for 2 hours or until it hardens. 


7. Cut into slices and serve. 


I hope that you enjoy my post today. 

Bom Apetite!!

Wednesday, December 21, 2011

Hello world

Hi everyone I been a little MIA from my baking blog, I still haven't replaced my oven and I feel really bummed out.... I miss baking :0( but besides from that I have been keeping myself occupied over at my crafting blog.   If you are a crafter, stamper, card maker be sure to pop on over we are always having fun challenges, and for those that are not crafty I have a special challenge for you.. 

So be sure to hop on over there we are having a link up your Christmas Tree party

Have a wonderful day! 


Monday, December 12, 2011

Chocoberry Pops

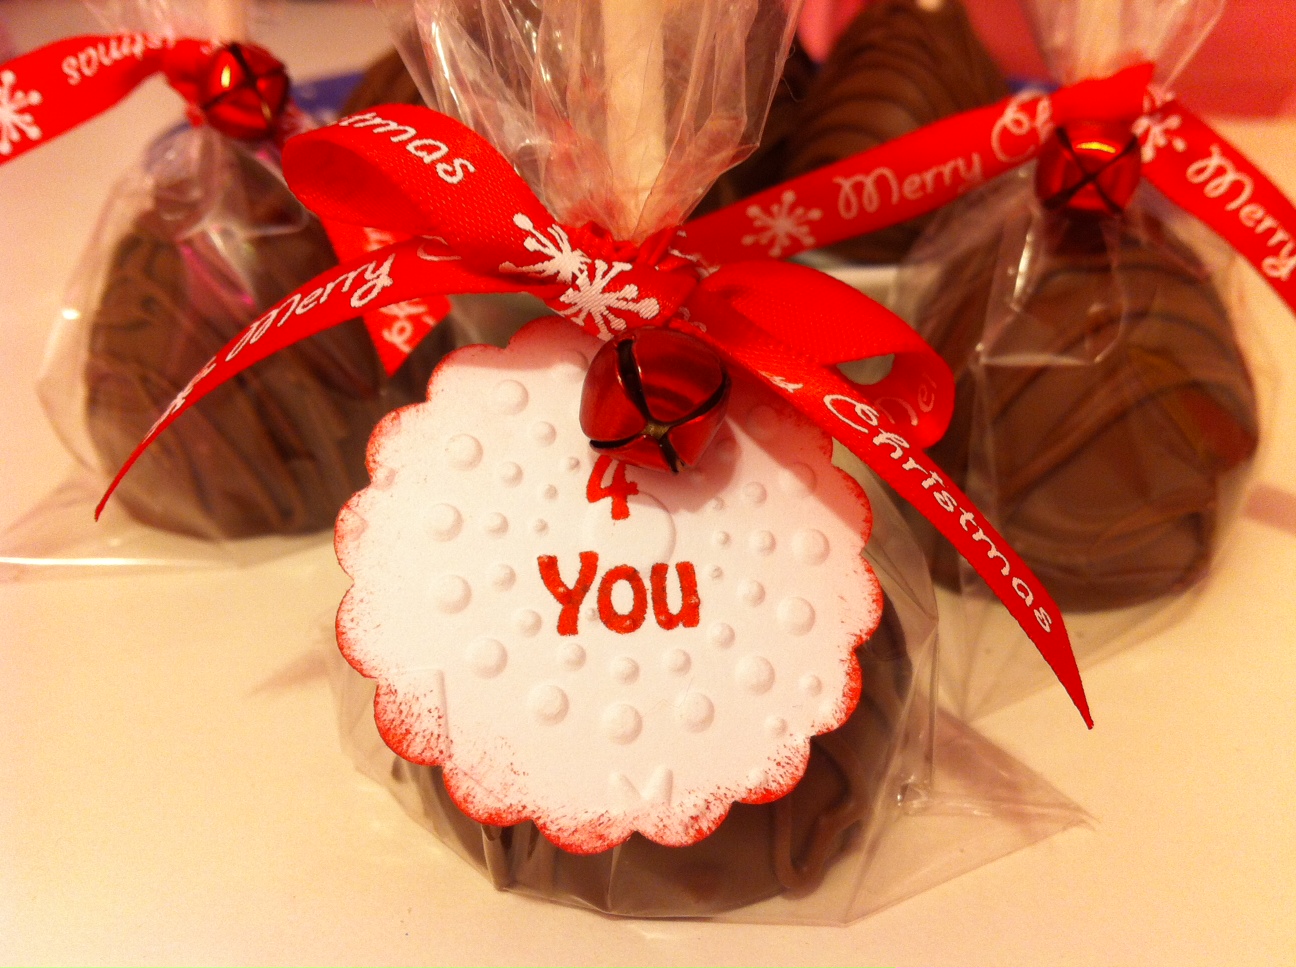
Hi everyone! I hope that your having a great week! How is your Christmas shopping coming along? Are you planning to give any homemade treats for your neighbors or friends? This year I decided to give some of my special treats to my close friends.  If you follow my blog you may know that my oven broke down on Thanksgiving day, so I haven't been able to post any yummy goodies for you, but even though my oven  is broken it doesn't meant that we can't eat sweet treats!!! Well here is what I decided to make today, I wil be making these to give has treats.

You will need:

Fresh Strawberries (wash strawberries but make sure they are completely dry)
Candy wafers (make'n mold are the ones I use the most, they seem to work better for me)
Lollipop sticks
Parchment or wax Paper

Instructions

1. Wash and dry the strawberries
2.  Melt you candy wafers however you like best (microwave or Electric Chocolate Melter)
3. Insert the lollipop stick into the melted chocolate, then insert it half way into the tip of the strawberry
4. Let it sit for a few minute or until the chocolate hardens
5. Dip the strawberry into the melted chocolate
6. Let it sit in the parchment/wax paper


Tada!!!

It's this simple 


You can customize the wrapping however you like 


For my wrapping I used: 

Mini treat bags  to wrap the treat
Michael's Ribbon - Merry Christmas
Michael's - Jingle bells
DC Stamps - 4 You Stamp 


I hope you enjoyed my post today. 

Sunday, November 27, 2011

News and another giveaway

This post will run until December 31

Hi Sunday everyone! 

I hope that your having a fantastic day! I came in to drop a few lines of some bad news and some good news.  The bad news is my oven broke down after our lovely Thanksgiving dinner but (I'm so glad it made it through the turkey).... that won't be fun ... no oven and no turkey. Well so until that is fixed or replaced I won't be having another sweet post to share but feel free to visit my crafting blog since there is always fun challenges and giveaways going on there! If you haven't visit my crafting blog you can go here! I'm sure you don't want to miss the fun! I hope to see you there as well.  So now the good news, about a week back I tweeted this picture, do you recall ? Click here to follow my tweets. I'm always up to something. 


Anyways I purchased two of these cute little Cakepop kit boxes by Bakerella, one for ME yayy and one for You (well a lucky one). 

Here is what the kit includes:  

 Handy booklet 
Paper Cake pop stand thats holds 12 pops 
Cello bags 
Pop sticks 
Gift Tags 
Colorful ribbon 

You can make 48 cakepops with all this material. 


Now one lucky winner will get this adorable box. 

Here's how you can win:

Become a follower if you are not one 
Leave a comment below 
One entry per person

Good luck everyone!


Friday, November 11, 2011

Look where I was at today!!

Hello everyone, I hope that you are having a good friday! What are your plans for the weekend? I would love for you to share!! Today I came in to drop off a few lines, I wanted to show you what I was up to today... Well I decided to take a trip to Hoboken (NJ) and guess where I stopped at?!!  Buddy's Bakery AKA CakeBoss.... but unfortunately the line was so long and it was about 2 hours wait and it was too cold to be outside on the line so I did not stayed :0(... but I did thought of you guys and I took a few shots to share with you all.... I hope you enjoy my photos.


I will make sure that the next time I go there I will get a cupcake and a little souvenir to giveaway!! I hope you enjoyed my post today, have a wonderful day! 

Wednesday, November 9, 2011

Camera Cake

Happy wednesday everyone!  Boy I been so backed up on my crafting that I had no time to come in a post my recent creation.  I'm here today to show you another cake I made for my BFF this past weekend.  She has been my BFF for many many years! I still remember when I first meet her... we were like 13 years old... 

Did I mentioned that she is a great photographer!?!?!? So I decided to give her a camera but one she can eat. hehehehe


and here she is...


I hope you enjoy my post today!! 

Have a wonderful week.


Monday, October 31, 2011

Cow Birthday Party

Hello everyone! I hope that your having a good monday.  Yesterday I had my CTMH class of the month and since my BFF birthday is this week, I decided to throw her a surprise birthday party.  She loves anything cows and farm theme.   Here is what I did for her.... 

Cake recipe: 

Red Velvet with cream cheese frosting 


Cupcake toppers: 
Using my cricut expression and create a critter cartridge I cut the cow shape at 2''. 


I hope that you enjoyed my post today.